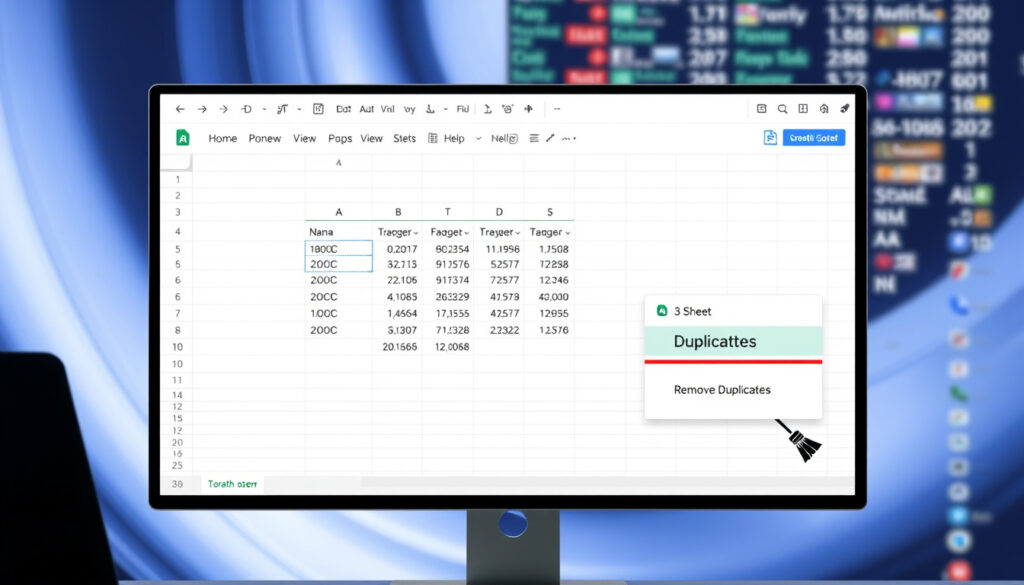
How to Remove Duplicates in Google Sheets (Quick Guide)
Anyone who has ever stared at a spreadsheet full of repeated rows knows the feeling: you can’t trust a single total until the duplicates are gone. Google Sheets makes the fix surprisingly simple — the built-in Remove duplicates tool from Google’s official help center (Google Help) sits a few clicks away in the Data menu, while the UNIQUE function offers a non-destructive route when you want the original data left alone.
Methods covered: 3 primary routes ·
Built-in tool access: 3 clicks via Data menu ·
Header row handling: Checkbox in dialog ·
Position retention: Possible with formulas
Quick snapshot
- Check the header-row box so column titles aren’t treated as data (Zapier (workflow automation platform)).
- UNIQUE returns a deduplicated list without changing the original source data (Ablebits (spreadsheet tooling specialist)).
- Column checkboxes in the dialog control which fields define a duplicate. (Zapier (workflow automation platform))
- Google’s docs don’t state a row limit or the exact matching algorithm for one cleanup pass. (Ablebits)
- The native tool scans from the top down; add-ons add a reverse-scan option to flip that behavior (Ablebits).
- What counts as a duplicate shifts with column selection — verify the checked columns before you commit. (Ablebits)
- Workflow: select range → Data → Data cleanup → Remove duplicates → confirm. (Sheets Help (formula reference))
- UNIQUE works from the top of the data down and discards later repeats (Sheets Help (formula reference)).
- After removal, Sheets reports how many duplicate rows it deleted. (Sheets Help (formula reference))
- For non-destructive cleanup, UNIQUE is the safest option because it writes to a new location (Sheets Bootcamp (Google Sheets tutorial site)).
- To keep exact positions, add an index column before touching the data. (Sheets Bootcamp (Google Sheets tutorial site))
- For repeatable cleanup, consider a dedicated add-on with extra match controls. (Sheets Bootcamp (Google Sheets tutorial site))
Six details separate a smooth cleanup from a messy one:
| Feature | Key detail |
|---|---|
| Built-in removal tool | Data > Data cleanup > Remove duplicates |
| Header row option | Check the box so column titles are ignored |
| Column matching | Compare all checked columns, or just one |
| Non-destructive output | =UNIQUE(range) writes unique rows elsewhere |
| Scan direction | UNIQUE works top-down and keeps first instances |
| Order preservation | UNIQUE output follows first-appearance order |
| Add-on control | Scanning order can be reversed in some add-ons |
How to quickly remove duplicates in Google Sheets?
Using the Built-in Remove Duplicates Feature
- Select the range that contains your data, including the header row if you have one.
- Open Data → Data cleanup → Remove duplicates.
- Check Data has header row so Sheets skips column titles.
- Uncheck any columns you don’t want to compare.
- Click Remove duplicates and read the result message.
That’s the whole process: no formulas, no add-ons, just a direct edit to the selected range. The dialog also lets you choose which columns define a match, and it treats values that differ only by letter case, number formatting, or formulas as duplicates (Google Help).
The native tool edits your source range directly. Check which columns define a duplicate first — once rows are gone, the only way back is Undo before you make another change.
The pattern: the native tool is the fastest edit, but it works on the original range and you cannot reverse it past the next edit.
Using the UNIQUE Function for Real-Time Deduplication
- Click an empty cell outside your data.
- Type =UNIQUE followed by the range, e.g., =UNIQUE(A2:A500) or =UNIQUE(A2:E500).
- Press Enter and let the result spill into the cells below.
- Leave the original range exactly where it is.
UNIQUE returns every distinct row in the order it first appears, so you get a clean list without deleting a single cell. Sheets Help (formula reference) explains that the function scans from the top down and discards later repeats.
That makes it the safest option when preserving original data matters, because the output lands in a new location instead of overwriting the source (Sheets Bootcamp). Workflow guides, including Simular’s, use the same compact pattern for one-click deduplication (Simular).
UNIQUE gives you a clean list in one step and leaves the original range alone — the right default for shared sheets where someone else controls the source data.
Third-Party Add-ons for Advanced Bulk Removal
- Open Extensions → Add-ons → Get add-ons.
- Install a duplicate-focused add-on from the Extensions menu.
- Open the add-on’s sidebar, select the range, and pick the dedupe mode.
Add-ons go beyond the native dialog. Ablebits (spreadsheet tooling specialist) notes that its Remove Duplicates add-on includes a checkbox to reverse the scanning order — so you can keep the last occurrence instead of the first.
The pattern: the built-in tool is the fastest one-click cleanup, UNIQUE trades speed for safety, and add-ons sit between the two. For a one-off cleanup with verified columns, the native path wins.
Is there a way to find duplicates in Google Sheets?
Highlighting Duplicates with Conditional Formatting
- Select the range you want to scan.
- Open Format → Conditional formatting.
- Choose Custom formula is.
- Enter a formula like =COUNTIF($A$2:$A$500, A2) > 1.
- Set a fill color and click Done.
Conditional formatting doesn’t delete anything — it paints the repeat offenders so you can see the pattern before you change the data. It’s a visual scan, not a cleanup, and it’s the fastest way to spot-check a column you’re unsure about.
Using COUNTIF to List Duplicate Occurrences
- Add a helper column next to your data.
- Enter =COUNTIF(A:A, A2) in row 2 and copy it down.
- Filter the helper column for values greater than 1.
- Clear the filter after reviewing so your data stays intact.
COUNTIF gives you a number for each row: 1 means the value appears once, 2 or more means there’s a duplicate somewhere in the range. Unlike conditional formatting, this approach leaves a permanent count you can sort, which helps when you need to decide which rows to keep.
Previewing Potential Duplicates with the Remove Duplicates Dialog
- Select the range.
- Open Data → Data cleanup → Remove duplicates.
- Review the column checkboxes and header-row setting.
- Click Remove duplicates and read the result message.
The dialog is also a preview tool: it shows exactly which columns will be compared, and after the operation, it reports how many duplicate rows were removed. If the number looks wrong, hit Undo immediately and adjust your column selection.
How to remove duplicates in Google Sheets but keep their position?
Why the Built-in Tool Changes Row Order
- The built-in tool keeps the topmost occurrence of each duplicate group and deletes the repeats.
- Rows below a deleted row shift up, so row numbers change.
- Anything that references the old rows can land on the wrong cell after cleanup.
SmoothSheet (Sheets how-to blog) notes that the built-in tool keeps the topmost instance when it removes duplicates. That preserves relative order, but it doesn’t preserve positions: the range shrinks and every row below a deletion moves up. If your spreadsheet logic depends on specific row numbers, the native cleanup will disrupt it.
Using a Helper Column with Index Numbers
- Insert a new column A and fill it with 1, 2, 3… down to the last row.
- Select the range including the index column.
- Run Data → Data cleanup → Remove duplicates.
- If an add-on or script reorders rows, sort by the index column to restore the original sequence.
The index column is a bookmark: it records the original order before any deletion happens. After the cleanup, a quick sort by that column puts every remaining row back where it started — a two-minute setup that turns a destructive tool into a reversible one.
The index method costs one extra column and saves the one thing the native tool can’t guarantee: exact row positions after cleanup.
Using the UNIQUE Function in Place
- Pick an empty column or a new sheet tab for the output.
- Enter =UNIQUE(A2:A500) or an all-column range like =UNIQUE(A2:E500).
- Leave the source range untouched and use the new list for reports or imports.
UNIQUE “in place” means the deduplicated list occupies a new area while the original stays exactly as it was. Sheets Help (formula reference) adds that UNIQUE keeps the first instance of each row in the order it originally occurred, which is precisely what you want when sequence is part of the data.
The catch: you can have speed, safety, or perfect positions — rarely all three with one command. The index-column method keeps positions with the built-in tool; UNIQUE keeps the original data untouched and preserves first-appearance order.
What is the shortcut for removing duplicates?
Why There Is No Built-in Keyboard Shortcut
- Google Sheets doesn’t ship a default shortcut for Remove duplicates.
- The command lives in the Data menu, not the toolbar.
- Most cleanup workarounds rely on macros or add-ons.
Unlike copy and paste, Remove duplicates has no native key combination in Google Sheets. The menu path is only three clicks, but it stops feeling fast when you clean the same workbook every day.
Creating a Custom Shortcut with Macros
- Go to Extensions → Macros → Record macro.
- Walk through the removal steps once: Data → Data cleanup → Remove duplicates.
- Stop recording, name the macro, and assign it to a shortcut number.
- Run it later from Extensions → Macros or with the assigned keys.
Macros use Apps Script under the hood, and Sheets lets you bind a recorded macro to a shortcut. It’s the closest thing to a native “remove duplicates” key — set it up once, and the whole flow runs from the keyboard afterward.
Using Add-on Shortcuts
- Open Extensions → Add-ons → Get add-ons.
- Search for a dedicated duplicate remover and install it.
- Open the add-on’s settings and check for shortcut or quick-run options.
- Trigger the cleanup from the add-on’s sidebar.
Add-ons that specialize in deduplication usually add their own way to launch quickly, because the native menu path is the bottleneck. The trade-off: another tool to configure, and another place where your data gets processed.
The implication: if you spend more than a few minutes a week cleaning sheets, a recorded macro pays for itself in one afternoon. For everyone else, the three-click Data menu path is short enough.
Where is the remove duplicates button?
On the Desktop Web Version
- Open the sheet in a browser.
- Select the range you want to clean.
- Click Data → Data cleanup → Remove duplicates.
On desktop, the button is a menu item under Data, grouped with cleanup actions. It doesn’t sit in the toolbar because Google treats it as a data-management command, not a formatting one.
On the Google Sheets Mobile App
- Open the sheet in the Google Sheets app.
- Select the data range by dragging the handles.
- Tap the three-dot menu → Data → Remove duplicates.
Mobile hides it one level deeper: the three-dot menu, then Data, then Remove duplicates. The header-row and column options are still there, just squeezed into the app’s compact layout.
Via the Extensions Menu for Add-ons
- Open Extensions → Add-ons → Get add-ons.
- Choose a duplicate remover and install it.
- Open it from Extensions → Add-ons whenever you need it.
Add-ons get their own home in the Extensions menu. After installation, the button lives there — a side panel opens and the add-on takes over duplicate detection from the native dialog.
The pattern: the button moves depending on where you are — Data menu on desktop, three-dot menu on mobile, Extensions menu for add-ons. Once you know the route, the actual removal takes one click.
What’s confirmed and what’s still unclear
Confirmed facts
- The native command lives under Data > Data cleanup > Remove duplicates.
- UNIQUE is the safest option when preserving original data matters, because it outputs results to a new location (Sheets Bootcamp).
- The dialog includes a header-row checkbox — Zapier’s guide (workflow automation platform) flags it as the step that stops Google from treating column titles as data.
What’s unclear
- Google doesn’t document a maximum row count or the exact matching algorithm for one cleanup pass.
- Guides differ on how strictly in-place removal preserves original positions; the safest route is to add an index column first.
- The all-column default can catch matches you didn’t intend — verify the checkboxes before confirming.
What the guides say
“Split text, remove duplicates or trim whitespace.”
“From the Data menu, select Data clean-up and then Remove duplicates.”
— Baz Roberts, writing on SmoothSheet (Sheets how-to blog)
For anyone who manages a shared spreadsheet, the real decision isn’t which button to click — it’s which data you can afford to lose. The native tool is fast and destructive, UNIQUE is safe but creates a second table, and add-ons add control at the cost of setup time. The analyst staring at a messy sheet on a Friday afternoon picks the method that preserves what can’t be rebuilt.
Related reading: Ablebits · Ablebits
support.google.com, workspace.google.com, androidpolice.com, softr.io, liveflow.com
Frequently asked questions
How do I remove duplicates based on one column only?
Select the range, open Data → Data cleanup → Remove duplicates, then uncheck every column except the one that defines a duplicate. Sheets will remove rows whose value in that column repeats while ignoring the other columns.
What is the difference between Remove duplicates and the UNIQUE formula?
Remove duplicates edits the selected range directly, deleting the extra rows it finds. UNIQUE writes a deduplicated list to a new location and leaves the source data untouched — which makes it the safer choice when you can’t afford data loss.
Can I undo a duplicate removal in Google Sheets?
Yes. Press Ctrl+Z (or Cmd+Z on a Mac) or go to Edit → Undo right after the removal. The rows come back because the cleanup is a normal edit to the range.
Why is the Remove duplicates button greyed out?
The command stays disabled when nothing is selected. Highlight the cells first, including any header row, then reopen Data → Data cleanup → Remove duplicates.
How do I find duplicates across multiple columns?
Select the columns, open the Remove duplicates dialog, and keep both columns checked — Sheets compares the combination. SmoothSheet (Sheets how-to blog) notes that by default all selected columns are compared when the tool runs.
What happens when I select all columns in the Remove duplicates dialog?
Sheets treats a row as a duplicate only when every selected column matches another row. Selecting all columns catches full-row duplicates; unchecking some columns catches matches on the remaining fields.
More related posts
 Bank of America Share Price: Buy or Sell? Buffett’s 50% Sale
 Best Free AI Image Generators Compared (2025)
 Arc de Triomphe Race – 2024 Results, History and Guide
 Harvey Norman Samsung Phones: Seniors, Budget & Performance
 William Tell (2024 Film): Cast, Plot, Accuracy
 Real Techniques Brush Set – Reviews and Buying Guide
 Marks and Spencers Galway: Opening Hours & Discounts
 Bord Gáis Customer Service: Phone, Hours & Contact Guide